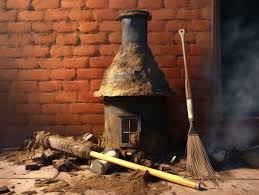
Understanding how to remove creosote buildup safely is crucial for homeowners with fireplaces or wood-burning stoves. This highly flammable residue forms when wood burns, especially under low temperatures or incomplete combustion. Regular cleaning is essential to prevent chimney fires and ensure your fireplace operates efficiently. In this creosote removal guide, we’ll walk you through the steps and share chimney cleaning tips to help you stay safe and maintain a clean chimney.
What is Creosote and Why is it Dangerous?
Creosote is a tar-like substance that accumulates in chimneys as wood burns. It exists in three stages:
- Stage 1: A flaky, soot-like layer that is easy to remove.
- Stage 2: A tar-like substance that adheres to the chimney walls and requires more effort to clean.
- Stage 3: A hardened glaze that is highly flammable and extremely difficult to remove.
Failing to address creosote buildup can lead to:
- Chimney fires
- Reduced efficiency of your fireplace
- Increased risk of harmful gases, like carbon monoxide, entering your home
How Often Should You Clean Your Chimney?
The National Fire Protection Association (NFPA) recommends annual chimney inspections and cleaning when necessary. For frequent fireplace users, it may be beneficial to clean your chimney every few months during the burning season.
Tools and Materials You’ll Need
To remove creosote safely, gather the following tools:
- Chimney brush (correct size for your chimney)
- Flexible rods for extending the brush
- Protective goggles and dust mask
- Drop cloths or plastic sheeting
- Vacuum with a HEPA filter
- Creosote remover (optional, for stubborn buildup)
Step-by-Step Guide on How to Remove Creosote Buildup Safely.
Following this guide ensures you understand how to remove creosote buildup safely, reducing fire risks and maintaining your chimney’s efficiency.
1. Prepare the Area
- Lay down drop cloths or plastic sheeting around the fireplace to catch debris.
- Wear protective gear, including goggles and a dust mask, to avoid inhaling dust and soot.
2. Inspect the Chimney
- Use a flashlight to examine the inside of the chimney for creosote buildup.
- Identify the severity of buildup to determine the necessary cleaning approach.
3. Choose a Cleaning Method
- For Stage 1 Buildup: Use a chimney brush and rods to scrape off the loose creosote.
- For Stage 2 Buildup: Consider using a chemical creosote remover to loosen the sticky tar before brushing.
- For Stage 3 Buildup: Professional cleaning may be necessary, as this hardened glaze often requires specialized tools.
4. Brush the Chimney
- Attach the chimney brush to the rods and insert it into the chimney.
- Use up-and-down motions to scrub the walls, ensuring you cover all areas.
- Check the brush periodically to remove accumulated debris.
5. Clean the Fireplace
- Use a vacuum with a HEPA filter to clean up fallen debris.
- Wipe down the interior walls of the fireplace with a damp cloth.
Additional Chimney Cleaning Tips
- Burn seasoned hardwoods: Using dry, seasoned wood reduces creosote formation.
- Maintain proper airflow: Ensure your chimney has adequate ventilation to promote efficient combustion.
- Use a creosote-reducing log: These logs help break down creosote deposits during regular use.
When to Call a Professional
If you notice a strong odor, excessive buildup, or have stage 3 creosote, it’s best to hire a certified chimney sweep. Professionals have the tools and expertise to handle stubborn creosote safely and effectively.
Final Thoughts
Regular chimney maintenance is essential for the safety and efficiency of your fireplace. By following this creosote removal guide and implementing these chimney cleaning tips, you can reduce fire risks and enjoy a clean, well-functioning chimney. Remember, when in doubt, call a professional to ensure thorough cleaning and peace of mind.

